David Hockney Inspired Polaroid Collage
First, we will make a Polaroid to work with.
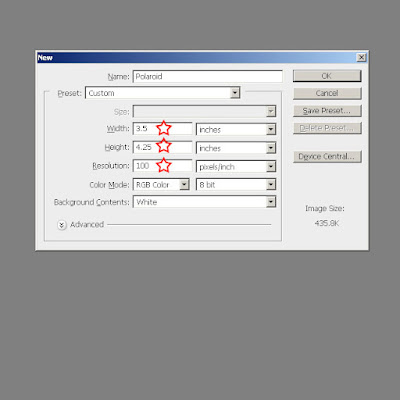
A. New Document: w=3.5 h=4.25 @ 100 p/i resolution.
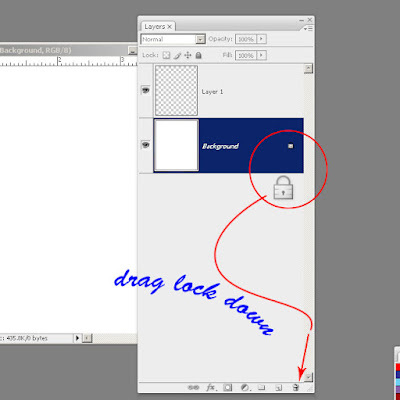
B. Then, drag the lock from the background into the trash, add a new layer, and grab the marquee tool (m).

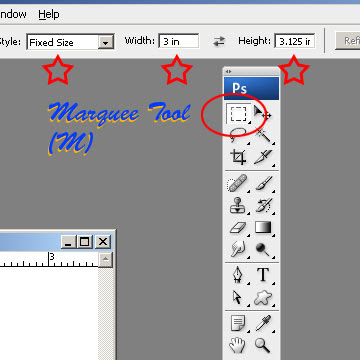
C. Go to the Option Bar while in your marquee tool and find the fixed size in the Style's drop-down menu option. (See Screen Shot.) Type in the following numbers: w=3" and h=3.125"...this will be the size of the photo within the larger frame we just made.
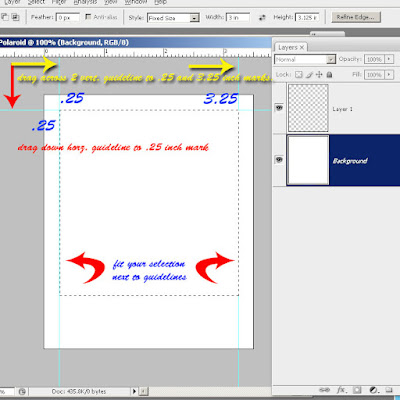
D. Drag down one horizontal guideline to the 1/4-inch mark. Drag 2 vertical guidelines across to the 1/4-inch and 31/4-inch marks.
 E. On the new layer above the background, click somewhere inside the canvas. You will see the fixed rectangle size with the "ants". Move in place within the following guidelines and fill with black, as seen in the screen shot. Don't forget to deselect your ants. (Ctrl + D)
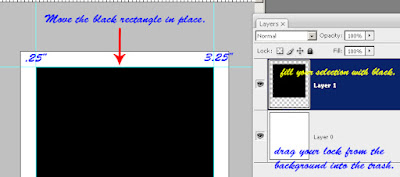 You are finished making the Polaroid...DO NOT FLATTEN THE LAYERS...as we will need to use both layers separately for our Collage's masking techniques.
Hockney-esque Collage Tutorial
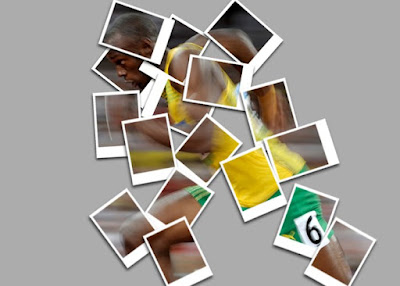
The Usain Bolt photo will be used in the tutorial--You should do this for practice if you haven't already. Use it still if for your own photo.
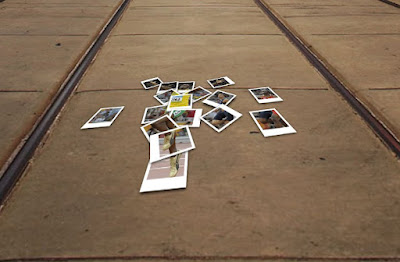
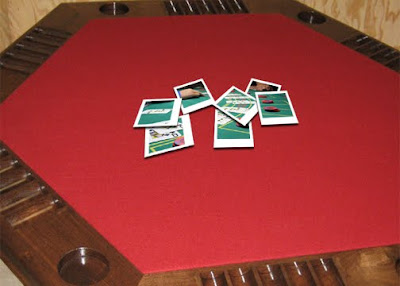
After you've done this once for practice, choose your own photo. Make sure it is a large download (between 2-4MB). Then, crop it to 5x7 (either portrait or landscape) @ 100 p/i resolution. You will need to duplicate at least 15 photos to be collaged, "randomly" positioned and rotated (as though you had a stack of polaroids in your hand and you suddenly tossed them onto a table or some other surface).
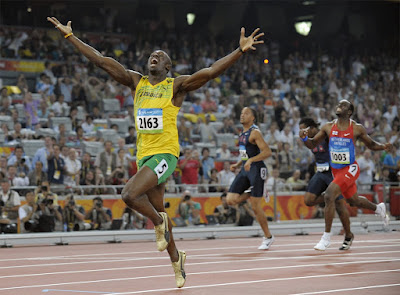
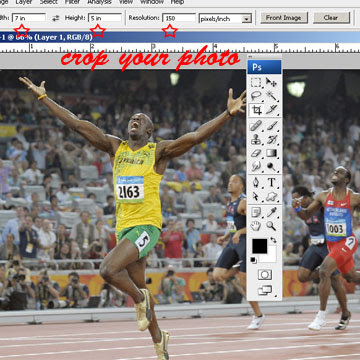
1. After you have brought your photo into Photoshop, make sure you crop it @ 5 x 7 @ 100 p/i resolution...you can choose either a horizontal or vertical orientation. It should depend on your photo choice.
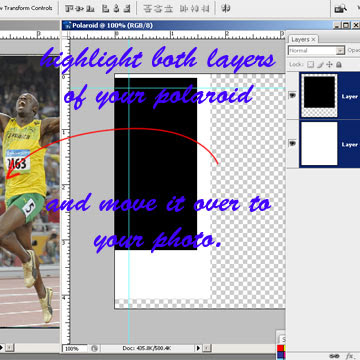
2. Now, go back to your Polaroid, highlight both layers, and move it over to your photo. Did you remember to drag your background lock to the trash?
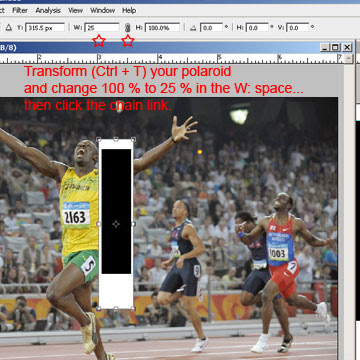
3. Transform (Ctrl + T) your polaroid to reduce the size to 25%. Locate this in the Options bar above your canvas. See screen shot.
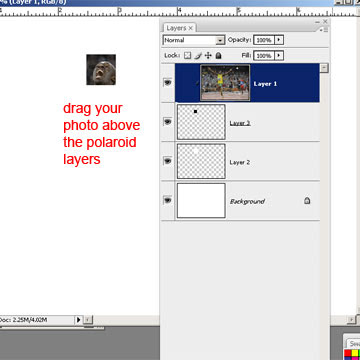
4. Drag your photo layer above your polaroid layers. Make a clipping mask with the top photo. Option + Ctrl + G. See screen shot.
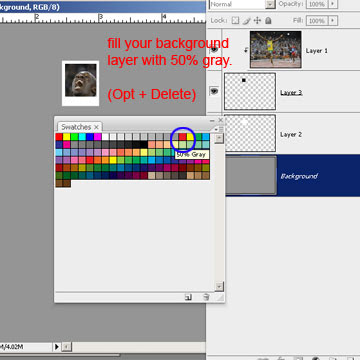
5. Fill the background (50% gray)...see screen shot.
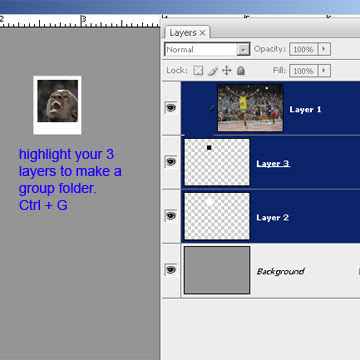
6. Group your layers. Highlight them and choose Ctrl + G.
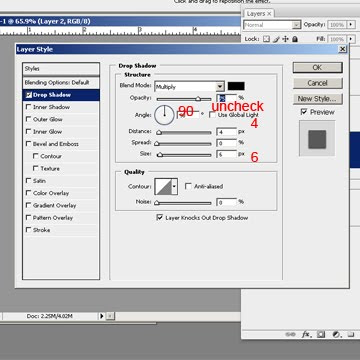
7. Apply a drop shadow (Fx symbol is at the bottom of the layers pallette.) to the White polaroid layer...see screen shot.
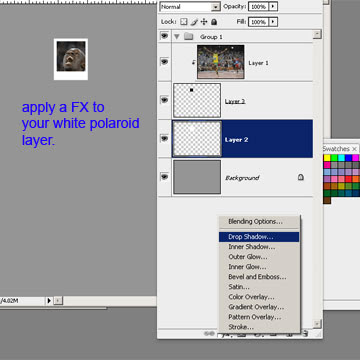
8. See the settings of the drop shadow. Uncheck "use global light", 90 degree angle, distance=4px, size=6px...
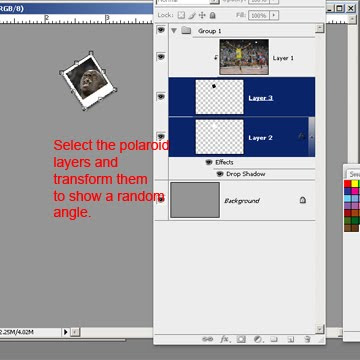
9. Transform your polaroid and give it a random-looking angle.
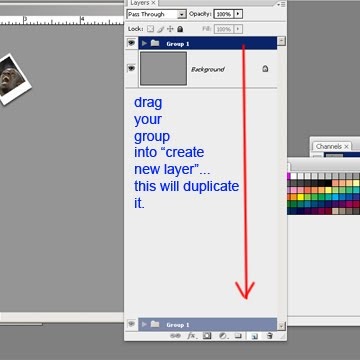
10. Duplicate your group by dragging it into the "Create new layer".
11. Position your new polaroid:
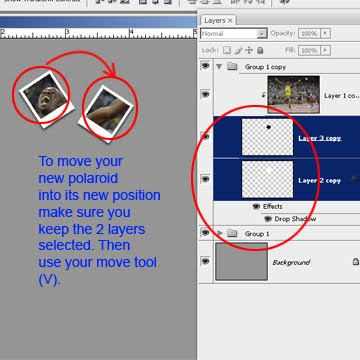
12. Repeat Step 11 to create your collage...remember to transform/rotate your polaroids to give it a random look (like it was thrown down onto the surface).
