1. Click on the photo: that will make it larger. Then "right click" to copy.

2. Go to Photoshop and Ctrl + N, Type file name to "Colorize Practice", and don't touch the Width and Height setting. Hit the OK button, then do Ctrl + V to paste. You will find the above photo pasted onto the canvas.
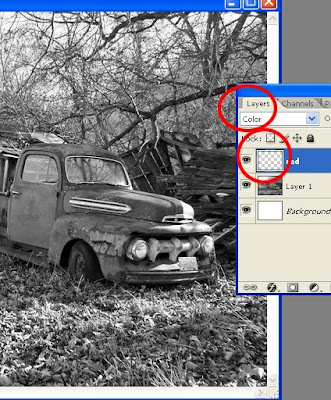
3. Add a layer above the photo and change the word "Normal" to "Color". (See the screen shot below.) Change the name of the "layer 2" to "red".

4. A. Go to the Tool Box and choose the paint brush (B)...B. Lower the Opacity slider to 50%...C. Choose a red color.
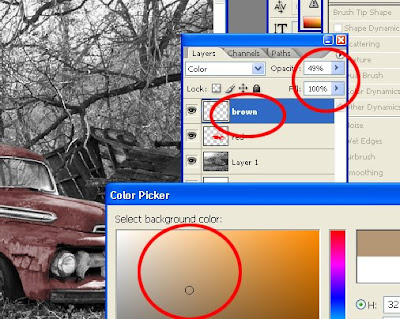
 5. I decided to reduce the Opacity for the "red" layer to 20%. The 50% was too red and unrealistic. Also, adjust your brush size with your bracket keys--you'll find these to the right of the letter "P" on the keyboard. The left one makes the brush smaller, and the right one makes it bigger. As you zoom (Z) into the picture to fill in small areas, you'll want to change the brush size to help you. Remember, Ctrl +0 will bring your whole canvas into view.
6. Finish the car for the "red" layer and then choose something else to color.
You will do the same process for the next object. For instance, if you want to work on the buildings and barn-like structures, you may want to use brown. Again, make a new layer, name it "brown", reduce opacity to 50% (to start), change the word normal to "color" (found in the layers palette), and choose a nice brown color.
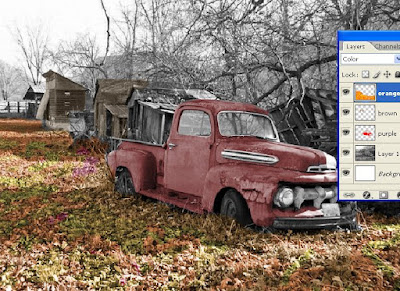
 7. For the leaves, I decided to try several oranges, yellows and reds and spent time trying to give it an autumn look. This will take some time, but do your best. Remember to play around with the Opacity settings.
8. Keep working until you finish the entire photo. Have fun! This is practice so you won't need to send this to me.
